Adding Graphics and Emoji characters to Apple push notifications

In this article, I’m going to show you how you can add some graphics to your Apple Push Notifications.

Basically you can’t add custom images to your payloads, because payloads are Json formatted strings and Json does not support binary data, but you can still add some Unicode characters called Emoji characters.

This will work on all IPhones since firmware 2.2 and there is no need to install any additional application on IPhone to use them. All you need to do is aading these characters including the forward slash in your message section of payloads.

Bellow is a full list of Emoji characters and their image:

e415\ue415 e056\ue056 e057\ue057 e414\ue414 e405\ue405 e106\ue106 e418\ue418
e417\ue417 e40d\ue40d e40a\ue40a e404\ue404 e105\ue105 e409\ue409 e40e\ue40e
e402\ue402 e108\ue108 e403\ue403 e058\ue058 e407\ue407 e401\ue401 e40f\ue40f
e40b\ue40b e406\ue406 e413\ue413 e411\ue411 e412\ue412 e410\ue410 e107\ue107
e059\ue059 e416\ue416 e408\ue408 e40c\ue40c e11a\ue11a e10c\ue10c e32c\ue32c
e32a\ue32a e32d\ue32d e328\ue328 e32b\ue32b e022\ue022 e023\ue023 e327\ue327
e329\ue329 e32e\ue32e e32f\ue32f e335\ue335 e334\ue334 e021\ue021 e337\ue337
e020\ue020 e336\ue336 e13c\ue13c e330\ue330 e331\ue331 e326\ue326 e03e\ue03e
e11d\ue11d e05a\ue05a e00e\ue00e e421\ue421 e420\ue420 e00d\ue00d e010\ue010
e011\ue011 e41e\ue41e e012\ue012 e422\ue422 e22e\ue22e e22f\ue22f e231\ue231
e230\ue230 e427\ue427 e41d\ue41d e00f\ue00f e41f\ue41f e14c\ue14c e201\ue201
e115\ue115 e428\ue428 e51f\ue51f e429\ue429 e424\ue424 e423\ue423 e253\ue253
e426\ue426 e111\ue111 e425\ue425 e31e\ue31e e31f\ue31f e31d\ue31d e001\ue001
e002\ue002 e005\ue005 e004\ue004 e51a\ue51a e519\ue519 e518\ue518 e515\ue515
e516\ue516 e517\ue517 e51b\ue51b e152\ue152 e04e\ue04e e51c\ue51c e51e\ue51e
e11c\ue11c e536\ue536 e003\ue003 e41c\ue41c e41b\ue41b e419\ue419 e41a\ue41a
e04a\ue04a e04b\ue04b e049\ue049 e048\ue048 e04c\ue04c e13d\ue13d e443\ue443
e43e\ue43e e04f\ue04f e052\ue052 e053\ue053 e524\ue524 e52c\ue52c e52a\ue52a
e531\ue531 e050\ue050 e527\ue527 e051\ue051 e10b\ue10b e52b\ue52b e52f\ue52f
e528\ue528 e01a\ue01a e134\ue134 e530\ue530 e529\ue529 e526\ue526 e52d\ue52d
e521\ue521 e523\ue523 e52e\ue52e e055\ue055 e525\ue525 e10a\ue10a e109\ue109
e522\ue522 e019\ue019 e054\ue054 e520\ue520 e306\ue306 e030\ue030 e304\ue304
e110\ue110 e032\ue032 e305\ue305 e303\ue303 e118\ue118 e447\ue447 e119\ue119
e307\ue307 e308\ue308 e444\ue444 e441\ue441
e436\ue436 e437\ue437 e438\ue438 e43a\ue43a e439\ue439 e43b\ue43b e117\ue117
e440\ue440 e442\ue442 e446\ue446 e445\ue445 e11b\ue11b e448\ue448 e033\ue033
e112\ue112 e325\ue325 e312\ue312 e310\ue310 e126\ue126 e127\ue127 e008\ue008
e03d\ue03d e00c\ue00c e12a\ue12a e00a\ue00a e00b\ue00b e009\ue009 e316\ue316
e129\ue129 e141\ue141 e142\ue142 e317\ue317 e128\ue128 e14b\ue14b e211\ue211
e114\ue114 e145\ue145 e144\ue144 e03f\ue03f e313\ue313 e116\ue116 e10f\ue10f
e104\ue104 e103\ue103 e101\ue101 e102\ue102 e13f\ue13f e140\ue140 e11f\ue11f
e12f\ue12f e031\ue031 e30e\ue30e e311\ue311 e113\ue113 e30f\ue30f e13b\ue13b
e42b\ue42b e42a\ue42a e018\ue018 e016\ue016 e015\ue015 e014\ue014 e42c\ue42c
e42d\ue42d e017\ue017 e013\ue013 e20e\ue20e e20c\ue20c e20f\ue20f e20d\ue20d
e131\ue131 e12b\ue12b e130\ue130 e12d\ue12d e324\ue324 e301\ue301 e148\ue148
e502\ue502 e03c\ue03c e30a\ue30a e042\ue042 e040\ue040 e041\ue041 e12c\ue12c
e007\ue007 e31a\ue31a e13e\ue13e e31b\ue31b e006\ue006 e302\ue302 e319\ue319
e321\ue321 e322\ue322 e314\ue314 e503\ue503 e10e\ue10e e318\ue318 e43c\ue43c
e11e\ue11e e323\ue323 e31c\ue31c e034\ue034 e035\ue035 e045\ue045 e338\ue338
e047\ue047 e30c\ue30c e044\ue044 e30b\ue30b e043\ue043 e120\ue120 e33b\ue33b
e33f\ue33f e341\ue341 e34c\ue34c e344\ue344 e342\ue342 e33d\ue33d e33e\ue33e
e340\ue340 e34d\ue34d e339\ue339 e147\ue147 e343\ue343 e33c\ue33c e33a\ue33a
e43f\ue43f e34b\ue34b e046\ue046 e345\ue345 e346\ue346 e348\ue348 e347\ue347
e34a\ue34a e349\ue349
e036\ue036 e157\ue157 e038\ue038 e153\ue153 e155\ue155 e14d\ue14d e156\ue156
e501\ue501 e158\ue158 e43d\ue43d e037\ue037 e504\ue504 e44a\ue44a e146\ue146
e50a\ue50a e505\ue505 e506\ue506 e122\ue122 e508\ue508 e509\ue509 e03b\ue03b
e04d\ue04d e449\ue449 e44b\ue44b e51d\ue51d e44c\ue44c e124\ue124 e121\ue121
e433\ue433 e202\ue202 e135\ue135 e01c\ue01c e01d\ue01d e10d\ue10d e136\ue136
e42e\ue42e e01b\ue01b e15a\ue15a e159\ue159 e432\ue432 e430\ue430 e431\ue431
e42f\ue42f e01e\ue01e e039\ue039 e435\ue435 e01f\ue01f e125\ue125 e03a\ue03a
e14e\ue14e e252\ue252 e137\ue137 e209\ue209 e154\ue154 e133\ue133 e150\ue150
e320\ue320 e123\ue123 e132\ue132 e143\ue143 e50b\ue50b e514\ue514 e513\ue513
e50c\ue50c e50d\ue50d e511\ue511 e50f\ue50f e512\ue512 e510\ue510 e50e\ue50e
e21c\ue21c e21d\ue21d e21e\ue21e e21f\ue21f e220\ue220 e221\ue221 e222\ue222
e223\ue223 e224\ue224 e225\ue225 e210\ue210 e232\ue232 e233\ue233 e235\ue235
e234\ue234 e236\ue236 e237\ue237 e238\ue238 e239\ue239 e23b\ue23b e23a\ue23a
e23d\ue23d e23c\ue23c e24d\ue24d e212\ue212 e24c\ue24c e213\ue213 e214\ue214
e507\ue507 e203\ue203 e20b\ue20b e22a\ue22a e22b\ue22b e226\ue226 e227\ue227
e22c\ue22c e22d\ue22d e215\ue215 e216\ue216 e217\ue217 e218\ue218 e228\ue228
e151\ue151 e138\ue138 e139\ue139 e13a\ue13a e208\ue208 e14f\ue14f e20a\ue20a
e434\ue434 e309\ue309 e315\ue315 e30d\ue30d e207\ue207 e229\ue229 e206\ue206
e205\ue205 e204\ue204 e12e\ue12e e250\ue250 e251\ue251 e14a\ue14a e149\ue149
e23f\ue23f e240\ue240 e241\ue241 e242\ue242 e243\ue243 e244\ue244 e245\ue245
e246\ue246 e247\ue247 e248\ue248 e249\ue249 e24a\ue24a e24b\ue24b e23e\ue23e
e532\ue532 e533\ue533 e534\ue534 e535\ue535 e21a\ue21a e219\ue219 e21b\ue21b
e02f\ue02f e024\ue024 e025\ue025 e026\ue026 e027\ue027 e028\ue028 e029\ue029
e02a\ue02a e02b\ue02b e02c\ue02c e02d\ue02d e02e\ue02e e332\ue332 e333\ue333
e24e\ue24e e24f\ue24f e537\ue537
I hope this helps you add more color to your Push notifications.
same as usual email me on toofan164@hotmail.com or leave a comment for me if you have any questions. I will be more than happy to assist you.

iOS Push Notifications in C# with Moon-APNS

I have been busy developing backend of an IPhone application which is sending considerable number of push notifications twice a day. Trying to fix some issues and bugs on other free and open source c# push notification libraries I came up with the idea of writing my own c# library and as a big fan of open source I’m going to share the library on GitHub.

The library is called Moon-APNS and it can be downloaded from here.

This is the first version of the library, but It has been tested under pressure and on a production version of an application so feel safe to plug it to you application. Moon-APNS can be used in any .net application web or windows based.

Moon-APNS is benefiting from new Apple Push Notification structure, called Enhanced Push Notification. Which enables the library to receive feedback on each notification sent to apple server asynchronously, you may say we can receive that response with apple feedback service, but unfortunately if you send a payload to apple server with wrong format, broken or missing device tokens apple will terminate the connection straight away and it’s really hard to figure out which one was the faulty payload when you are sending them one after each other because it takes up to 2 seconds for the connection to be closed. Using Enhanced push notification you can sign each payload with a unique identifier and even better you can set TTL on each payload so apple know how long they should try to deliver the push notification before it expires. Moon-APNS will send payloads and receive feedback asynchronously and will re connect and resume sending the queue in case of any errors. All device tokens of rejected payloads will return as a list when the queue is sent and feedback is received from apple with error code sent by apple so you will know why the payload was rejected.

In Moon-APNS I’m using free and open source NLog library to log all events happening behind the scene which makes it really easy to debug the application while you are on production and you can’t attach a debugger.

Sending Apple push notification has never been so easy with Moon-APNS you will need less than 10 lines of code to send push notification and receive the feedback.

Ok enough talking I think it’s time for some coding.

1) You should generate your payloads:

 1:  var payload1 = new NotificationPayload("DeviceToken","Hello !",1,"default");

Feel free to add custom parameters to your payload as bellow:

 1: payload1.AddCustom("CustomKey", "CustomValue");

2) Moon-APNS accepts a list of payloads, so I will add my payloads to a List:

 1: var notificationList = new List {payload1, payload2, payload3};

3) create an instance of Moon-APNS push notification class, and pass true or false for using sandbox, location of your p12 file, and password for thep12 file if you have one and blank string if you don’t have one.

 1: var push = new PushNotification(false, "P12File location","password");

4) Create a list for your feedback, returned from library which will contain rejected payloads list.

5) Saved best for last call SendToApple method and pass list of your payload.

 1: var rejected = push.SendToApple(notificationList);

Is that all? Well yes it is! So if we ignore lines for generating payloads I can say we are sending push notification ad receiving feedback in 2 lines of code. Everything you need to do is handled by Moon-APNS library for you so you can have more time to consider on your application logic.

Feel free to email me or post your questions as a comment and I’ll be more than happy to assist you as much as I can.

This is the first version and I will commit new builds with new features soon.

Sending Apple Push Notifications in ASP.NET and C# – part 4 (Moon-APNS C# wrapper class)

Sorry for the delay, please email me on toofan164@hotmail.com if you had any questions about this article series and Ill help you as much as i can.

Bellow is a wrapper class for Moon-APNS Library, using this wrapper class is really easy.

First you need to reference Moon-APNS project in your solution, also you can build them and reference dll files.

I have added a detailed post about Moon-APNS and how you can use it here :

https://arashnorouzi.wordpress.com/2011/08/10/ios-push-notifications-in-c-with-moon-apns/

I have added lots of comments in the source code,so its really easy to find your way around the code. but feel free to email me if you had any questions.

Sending Apple Push Notifications in ASP.NET and C# – part 3 (APNS Certificates Registration on Windows)

Now that we have our certificate and our key for that, Its time to install them on Development Machine we will use t send the apple push notifications.

The approach for this task is pretty strait forward but unfortunately I could not find a complete article about it when i was developing my first application.

Step one : Open Microsoft Management Console

To do this press Windows + R keys at the same time to open Run. Type ‘mmc’ and press enter.

This should open Following window on your screen:

Step Two: Add Certificates Snap-in to your console

Click on file and select Add/Remove snap-in from menu. This will open a new window with a list of available snap-ins on the left .

Select Certificates form list on the left and hit Add button. Select Computer Account form the next prompt , Local computer form next one and click on finish.

Your Add snap-in window should look like this:

And when you click ok button you will see :

Step Three: Certificate installation

Click on Certificates(local Computer) to expand the list. Right click on personal, then select all tasks and click on import. This will open Certificate import wizard.

Click on next ,and select your .cer file in next step. In next step select second option to place all certificates in Personal store.

Press finish and you should see a confirmation message about successful installation on Certificate.

Repeat above step to import your .P12 file, now Expand Personal on left side and click on certificates.You should be able to see your certificate in right panel. If your .p12 is password protected , you need to enter the password in the wizard.

Repeat all import process to import your certificate and .p12 files to ” Trusted Root Certification Authorities ” Section.

Now you have imported required certificates to sign your APNS messages to Apple push notification server.

In Next and last part of this Article series, I will cover how you can send apple push notifications from your ASP.net application.

Sending Apple Push Notifications in ASP.NET and C# – part 2 (Generating APNS Certificates)

In last post we covered concepts of push notification, and in this post we will learn how to generate Apple Push Notification certificate to sign our requests.

Why do you need an Apple APNS certificate?

Apple requires that each organization maintain their own certificate to ensure a secure mechanism for their corporate devices to communicate across Apple’s push notification messaging network.

Generating the Apple Push Notification SSL certificate on Mac:

To request an iPhone Development Certificate, you first need to generate a Certificate Signing Request (CSR) utilizing the Keychain Access application in Mac OS X Leopard. The creation of a CSR will prompt Keychain Access to simultaneously generate your public and private key pair establishing your iPhone Developer identity. Your private key is stored in the login Keychain by default and can be viewed in the Keychain Access application under the ‘Keys’ category. To generate a CSR:

1. In your Applications folder, open the Utilities folder and launch Keychain Access.
2. In the Preferences menu, set Online Certificate Status Protocol (OSCP) and Certificate Revocation List (CRL) to “Off”.

3. Choose Keychain Access -> Certificate Assistant -> Request a Certificate from a Certificate Authority. Note: If you have a noncompliant private key highlighted in the Keychain during this process, the resulting Certificate Request will not be accepted by the Program Portal. Confirm that you are selecting “Request a Certificate From a Certificate Authority…” and not selecting “Request a Certificate From a Certificate Authority with …”

4. In the User Email Address field, enter your email address. Please ensure that the email address entered matches the information that was submitted when you registered as an iPhone Developer.

5. In the Common Name field enter your name. Please ensure that the name entered matches the information that was submitted when you registered as an iPhone Developer.

6. No CA (Certificate Authority) Email Address is required. The ‘Required’ message will be removed after completing the following step.

7.Select the ‘Saved to Disk’ radio button and if prompted, select ‘Let me specify key pair information’ and click ‘Continue’.

8.If ‘Let me specify key pair’ was selected, specify a file name and click ‘Save’. In the following screen select ‘2048 bits’ for the Key Size and ‘RSA’ for the Algorithm. Click ‘Continue’.

9.The Certificate Assistant will create a CSR file on your desktop.

Submitting a Certificate Signing Request for Approval

  1. After creating a CSR, log in to the iPhone Developer Program Portal and navigate to ‘Certificates’ > ‘Development’ and click ‘Add Certificate’.
  2. Click the ‘Choose file’ button, select your CSR and click ‘Submit’. If the Key Size was not set to 2048 bits during the CSR creation process, the Portal will reject the CSR.
  3. Upon submission, Team Admins will be notified via email of the certificate request.
  4. Once your CSR is approved or rejected by a Team Admin, you will be notified via email of the change in your certificate status.


Approving Certificate Signing Requests

  1. After submitting a CSR for approval, Team Admins will be directed to the ‘Development’ tab of the ‘Certificates’ section. Here, CSRs can be approved or rejected by clicking the corresponding action next to each request.
  2. Once a CSR is approved or rejected, the requesting Team Member is notified via email of the change in their certificate status. Each iPhone Development Certificate is available to both the Team Member who submitted the CSR for approval and to the Team Admin(s).

Downloading and Installing Development Certificates

  1. In the ‘Certificates’ > ’Distribution’ section of the Portal, control-click the WWDR Intermediate Certificate link and select “Saved Linked File to Downloads” to initiate download of the certificate.
  2. On your local machine, double-click the WWDR Intermediate certificate to launch Keychain Access and install.
  3. Upon CSR approval, Team Members and Team Admins can download their certificates via the ‘Certificates’ section of the Program Portal. Click ‘Download’ next to the certificate name to download your iPhone Development Certificate to your local machine.
  4. On your local machine, double-click the downloaded .cer file to launch Keychain Access and install your certificate.
  5. Team Members can only download their own iPhone Development Certificates. Team Admins have the authority to download the public certificates of all of their Team Members. Apple never receives the private key for a CSR. The private keys are not available to anyone except the original key pair creator and are stored in the system keychain of that Team Member.

Generating an App ID

  1. Team Agents or Team Admins should navigate to the ‘App ID’ section of the Program Portal.
  2. Click ‘Add ID’.
  3. Enter a common name for your App ID. This is a name for easy reference and identification within the Program Portal.
  4. Enter a Bundle Identifier in the free-form text field. The recommended usage is a reverse-domain name style string, e.g., com.domainname.applicationname. For a suite of applications sharing the same Keychain access, you should use a wild-card character in the Bundle Identifier
    (e.g. com.domainname.* or *). This Bundle Identifier will need to match whatever CF Bundle Identifier you use for your application in Xcode.
  5. You need to create an App ID without .* in the iPhone developer Portal. An App ID without .* means its unique and works only for a single application(for Push-Notification).
  6. Click ‘Submit’. At this time, the 10 character Bundle Seed ID is generated and concatenated with the Bundle Identifier you entered. This resulting string is your App ID. Note: The Bundle Seed ID does not need to be entered into Xcode.
  7. Generate a new App ID for each set of applications with shared Keychain Access needs. If you are creating a suite of applications that will share the same Keychain access (e.g. sharing passwords between applications) or have a set of applications with no Keychain Access requirements, create a single App ID for all applications utilizing a trailing asterisk as a wild-card character.

Registering an App ID for Apple Push Notification service

  1. In the App ID section of the Program Portal, locate the App ID you wish to use with the Apple Push Notification service. Only App IDs with a specific bundle ID can be used with the APNs. You cannot use a “wild-card” application ID. You must see “Available” under the Apple Push Notification service column to register this App ID and configure a certificate for this App ID.
  2. Click the ‘Details’ link next to your desired App ID.
  3. In the Configure App ID page, check the Enable Push Notification Services box and click the Configure button. Clicking this button launches the APNs Assistant, which guides you through the next series of steps that create your App ID specific Client SSL certificate.
  4. Download the Client SSL certificate file to your download location. Navigate to that location and double-click the certificate file (which has an extension of cer) to install it in your keychain.
  5. When you are finished, click Done in the APNS Assistant.
  6. Double-clicking the file launches Keychain Access. Make sure you install the certificate in your login keychain on the computer you are using for provider development. The APNs SSL certificate should be installed on your notification server.
  7. When you finish these steps you are returned to the Configure App ID page of the iPhone Dev Center portal. The certificate should be badged with a green circle and the label “Enabled”.
  8. To complete the APNs set-up process, you will need to create a new provisioning profile containing your APNs-enabled App ID.

Creating a Development Provisioning Profile

  1. In the ‘Provisioning’ section of the Portal, Team Admins should click ‘Add’ on the Development tab.
  2. Enter a name for the provisioning profile.
  3. Specify which devices will be associated with the provisioning profile. You must specify a device in order for that device to utilize the provisioning profile. If a device’s UDID is not included in the provisioning profile the profile and your application cannot be installed on that device.
  4. Specify which iPhone Development Certificates will be associated with the provisioning profile. You must specify an iPhone Development Certificate in order for the application code signed with that same certificate to run on the device.
  5. Specify a single App ID for the Development Provisioning Profile. Each Development Provisioning Profile can specify only ONE App ID, therefore, if you have applications requiring different Keychain access, you will need to create a separate Development Provisioning Profile for each of those applications. If you are installing a suite of applications with the same required Keychain access or have a set of applications not requiring access to the Keychain, use an App ID containing the wild-card asterisk character to build all of your applications.
  6. Click ‘Submit’ to generate your Development Provisioning Profile.

Installing a Development Provisioning Profile

All Team Agents, Admins and Members can download a Development Provisioning Profile from the ‘Provisioning’ section of the Portal after it has been created. Only those developers whose Apple device IDs and iPhone Development Certificates are included in the provisioning profile will be able to install and test their application on their device.

  1. In the ‘Provisioning’ section of the Program Portal, click the download button next to the desired provisioning profile.
  2. Drag the downloaded file onto the Xcode application icon in the dock or into the ‘Organizer’ window within Xcode. This will automatically copy the .mobileprovision file to the proper directory. Alternatively, you can drag the .mobileprovision file onto the iTunes icon in the dock or copy the file to ‘~/Library/MobileDevice/Provisioning Profiles’. If the directory does not exist you will need to create it. Click on the ‘+’ button in the Provisioning section of the Organizer window to install your .mobileprovision file.


Building and Installing your Development Application

Now that you have an approved iPhone Development Certificate, an assigned Apple device and a properly installed Development Provisioning Profile, Xcode can now build your application and install it on your development device. If you have a single iPhone Development Certificate and iPhone Development Provisioning Profile, you don’t need to change any settings in Xcode to start running your applications. To compile and install your code:

  1. Launch Xcode and open your project.
  2. In the Project Window, select ‘Device – iPhone OS’ from the ‘Device | Debug’ drop down menu in the upper-left hand corner.
  3. Highlight the project Target and select the ‘Info’ icon from the top menu bar.
  4. In the Target Info window, navigate to the ‘Build’ pane. Click the ‘Any iPhone OS Device’ pop-up menu below the ‘Code Signing Identity’ field and select the iPhone Development Certificate/Provisioning Profile pair you wish to sign and install your code with. Your iPhone Development certificate will be in bold with the Provisioning Profile associated with it in grey above. In the example below, ‘iPhone Developer: Team Leader’ is the Development Certificate and ‘My First Development Provisioning Profile’ is the .mobileprovision file paired with it.Note: If the private key for your iPhone Development certificate is missing, or if your iPhone Development certificate is not included in a provisioning profile, you will be unable to select the iPhone Development Certificate/Provisioning Profile pair and you will see the following. Re-installing the private key or downloading a provisioning profile with your iPhone Development certificate included in it will correct this.
  5. In the Properties Pane of the Target Info window, enter the Bundle Identifier portion of your App ID. If you have used an explicit App ID you must enter the Bundle Identifier portion of the App ID in the Identifier field. For example enter com.domainname.applicationname if your App ID is A1B2C3D4E5.com.domainname.applicationname. If you have used a wildcard asterisk character in your App ID, replace the asterisk with whatever string you choose.


In my next post, I will cover Apple Push Notifications certificates installation on windows.

Sending Apple Push Notifications in ASP.NET and C# – part 1

In this article series i will cover sending apple push notifications form asp.net application. This will be a detailed article so I will break it down to 5 parts.

Part 1 will cover key concepts about APNS service, how we can use it and its restrictions.

Part 2 will cover generating required certificates for sending push notification.

part 3 will cover installation of certificates on your computer.

part 4 will cover sending push notification using Moon-APNS library.

What is Push Notifications?

One of the widely anticipated features of the new iPhone OS 3.0 is push notifications which allow messages to be sent directly to an individual device relevant to the application that has been installed. Apple has demoed this as useful for news alerts, or IM notifications.

Apple provides detailed code documentation for the iPhone OS code that is needed to implement and handle the alerts on the device but only provides a higher level guide for the provider server side.

As a provider, you need to communicate with the Apple Push Notification Service (APNS) to send the messages that are then pushed to the phone. This is necessary so that the device only needs to maintain 1 connection to the APNS, helping to reduce battery usage.

This tutorial will go into code-level detail about how we built our push notification provider server to allow us to interact with the APNS. Since we develop in asp.net, our examples will be in C#.

Bellow is a sample push notification on iPhone screen:
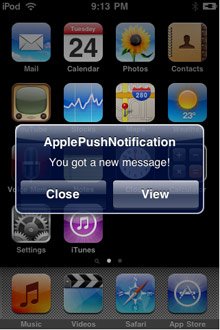
Sample notification on iPhone screen

Basic Structure for APNS

  1. You connect to the APNS using your unique SSL certificate
  2. Cycle through the messages you want to send
  3. Construct the payload for each message
  4. Disconnect from APNS

The flow of remote-notification data is one-way. The provider composes a notification package that includes the device token for a client application and the payload. The provider sends the notification to APNs which in turn pushes the notification to the device.

Apple documentation

Restrictions

  • The payload is limited to 256 bytes in total – this includes both the actual body message and all of the optional and additional attributes you might wish to send. Push notifications are not designed for large data transfer, only for small alerts. For example we only send a short alert message detailing the server monitoring alert triggered.
  • APNS provides limited status feedback as to whether your message was successfully delivered. One reason for this is that messages are queued to be sent to the device if it is unreachable, however only the last sent message will be queued – overwriting any previously sent but undelivered messages. Only feedback available is for devices Tokens that were previously but are no longer valid, such as if the user has uninstalled your iPhone application and do not receive notifications any more.
  • Push notifications should not be used for critical alerts because the message will only be delivered if the device has internet connectivity.
  • The SSL certificates used to communicate with APNS, discussed below, are generated on an application level. The implementation discussed in this tutorial only concerns a single iPhone application so if you have several, you will need to adapt the code to use the appropriate certificate(s) where necessary.

Device Token

Each push message must be “addressed” to a specific device. This is achieved by using a unique device Token generated by APNS within your iPhone application. Once this token has been retrieved, you need to store it on your server, not within your iPhone application itself. It looks something like this:

c9d4c07c fbbc26d6 ef87a44d 53e16983 1096a5d5 fd825475 56659ddd f715defc

On This Tutorial we will use an open source library called “Moon-APNS” to create notification, send them to apple servers and receive feedback. This library can be downloaded from https://github.com/arashnorouzi/Moon-APNS

Feedback Service

Apple provides a feedback service which you are supposed to occasionally poll. This will provide a list of device Tokens that were previously but are no longer valid, such as if the user has uninstalled your iPhone application. You can then remove the devices Tokens from your database so you do not communicate with an invalid device.

Payload Contents

The payload is formatted in JSON, compliant with the RFC 4627 standard. It consists of several parts:

  • Alert – the text string to display on the device
  • Badge – the integer number to display as a badge by the application icon on the device home screen
  • Sound – the text string of the name of the sound to accompany the display of the message on the device

*This tutorial will only deal with the basics by sending a simple alert text string but this can also be another dictionary containing various options to display custom buttons and the like.

The raw interface

Once an alert is generated within Server Density, the payload is built and then inserted into a queue. This is processed separately so that we can send multiple payloads in one go if necessary.

Apple recommends this method because if you are constantly connecting and disconnecting to send each payload, APNS may block your IP.

As described by Apple:

In Next article we will cover how we can generate required certificates for sending push notifications.